Floor Plan
Turn a drawing into a rendered floor plan, then select a room and camera to create an interior view.
Updated
On this page
Before you start
Upload a floor-plan drawing. The same upload can produce a top-down rendered plan or an eye-level interior view.
Step by step
-
Open Floor Plan, upload the drawing and choose Rendered floor plan. Set the mood, palette, wall treatment, furniture and lighting. In Rooms, set the flooring for each room. Use Additional notes for details such as cabinetry and worktops, and adjust the detected object list where needed. Generate the plan.
-
Download the result or edit its settings for another version. Choose Render a view inside the plan to continue with the rendered plan.
-
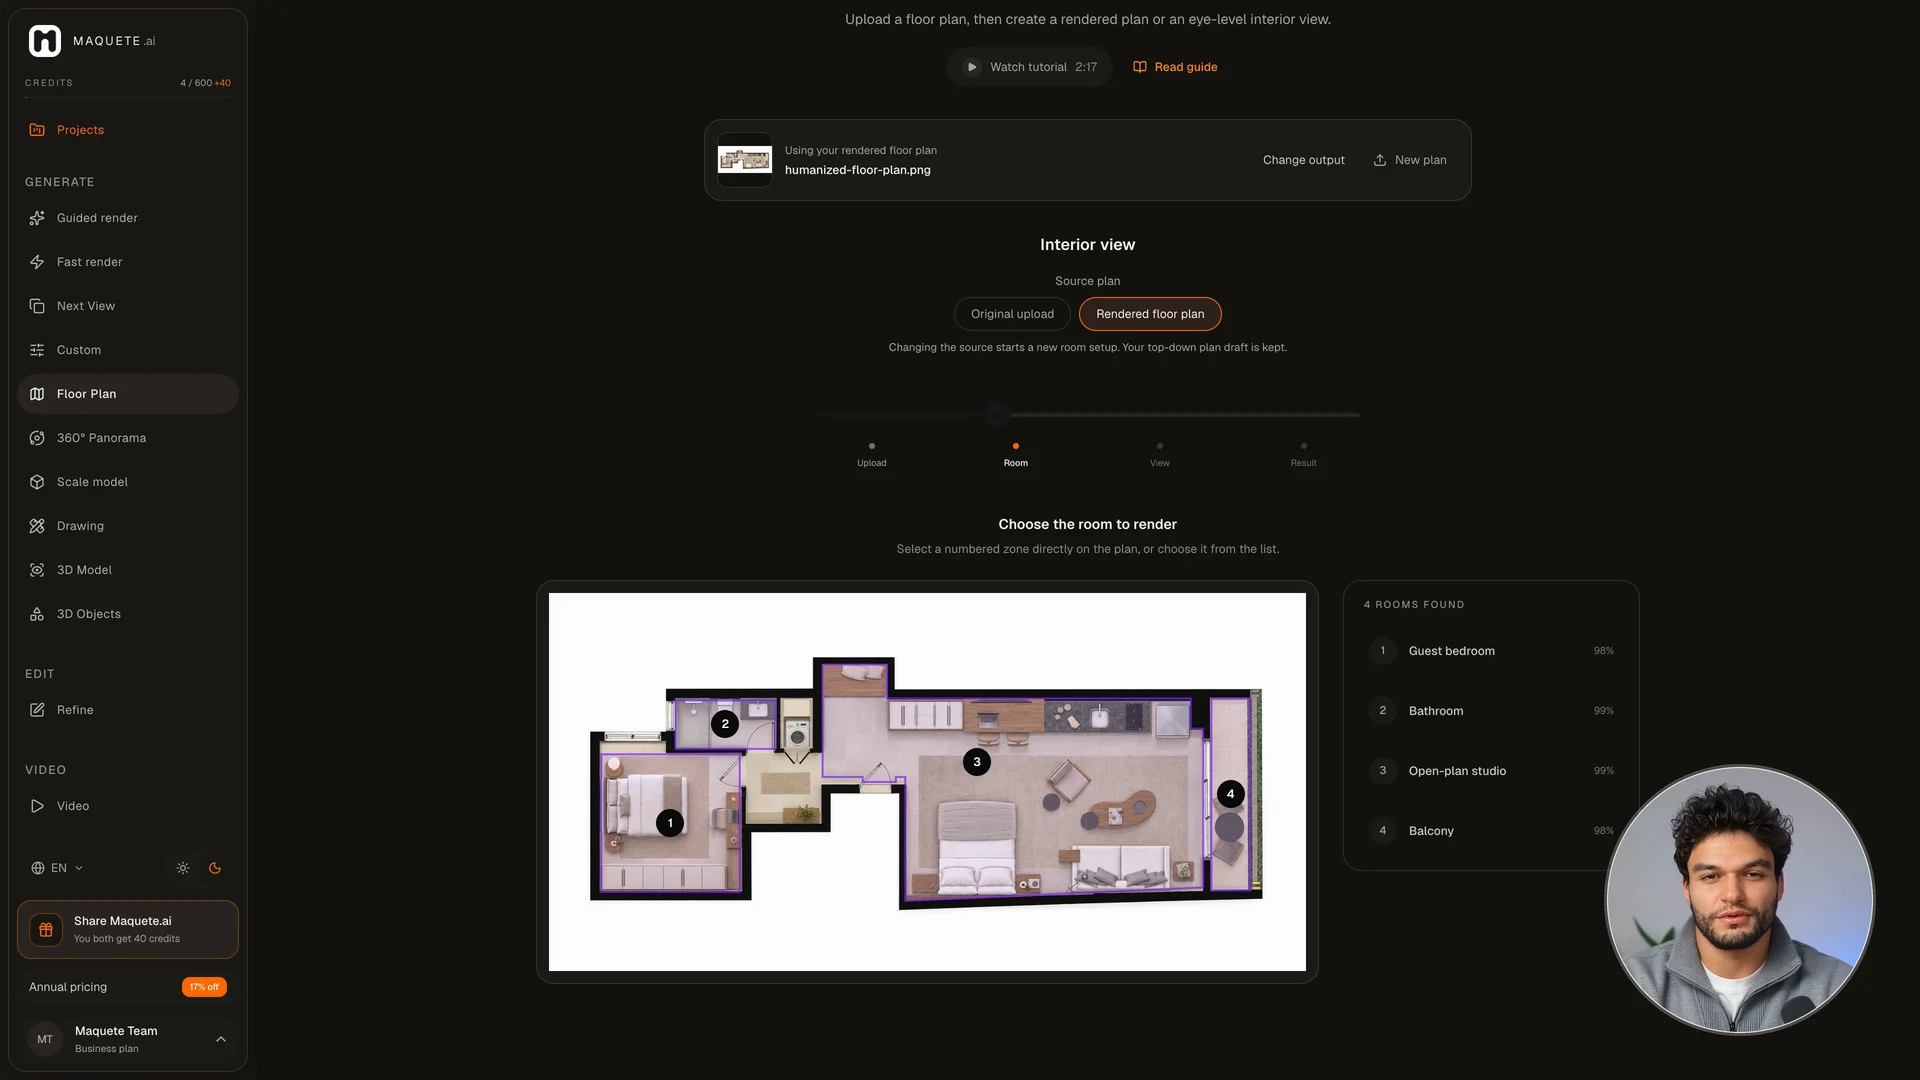
In Interior view, use the rendered plan or your original upload. Select a numbered room on the image or choose it from the list. Choose the camera direction, set the ceiling height and select Prepare this view.
-
Use the chat for specific room details. Apply a proposed change with Update preview, then choose Generate room view. Download the image or save it to a project.
Settings that matter
Mood and Palette allow multiple selections. Room markers identify the selected space; View direction sets the framing. Changing between the original and rendered source starts a new room setup while keeping the top-down plan draft.
If you need another view
Create another view of the same room, or return to the plan to choose a different room. If analysis cannot finish, use the retry action. You can choose a room from the list as well as from the plan.