Physical scale models
Turn architectural images into photographed scale models. Choose the finish, presentation and framing, explore angle controls, and download the result.
Updated
On this page
Before you start
Let's turn an architectural image into a photographed scale model.
Step by step
-
Open Scale model and upload an image from your computer. You can add up to four views of the same project. The first is marked Primary. Use Add another view to include more angles or details. Maquete analyses the image and prepares questions about how the model should look.
-
Choose Realistic for a model with colours and materials, or Monochromatic for a conceptual finish. For this house, choose Monochromatic, then select Balsa wood and Natural colour of the material. Under presentation, choose Studio backdrop, then select White. If you're asked about vegetation, leave it out for this example so the focus stays on the architecture. Anything else is where you can add extra instructions. We'll leave it blank here.
-
Under Ratio, choose Custom and enter three by four for a portrait layout. Choose 2K. A 2K image uses one credit; a 4K image uses two. Select Generate maquete render.
-
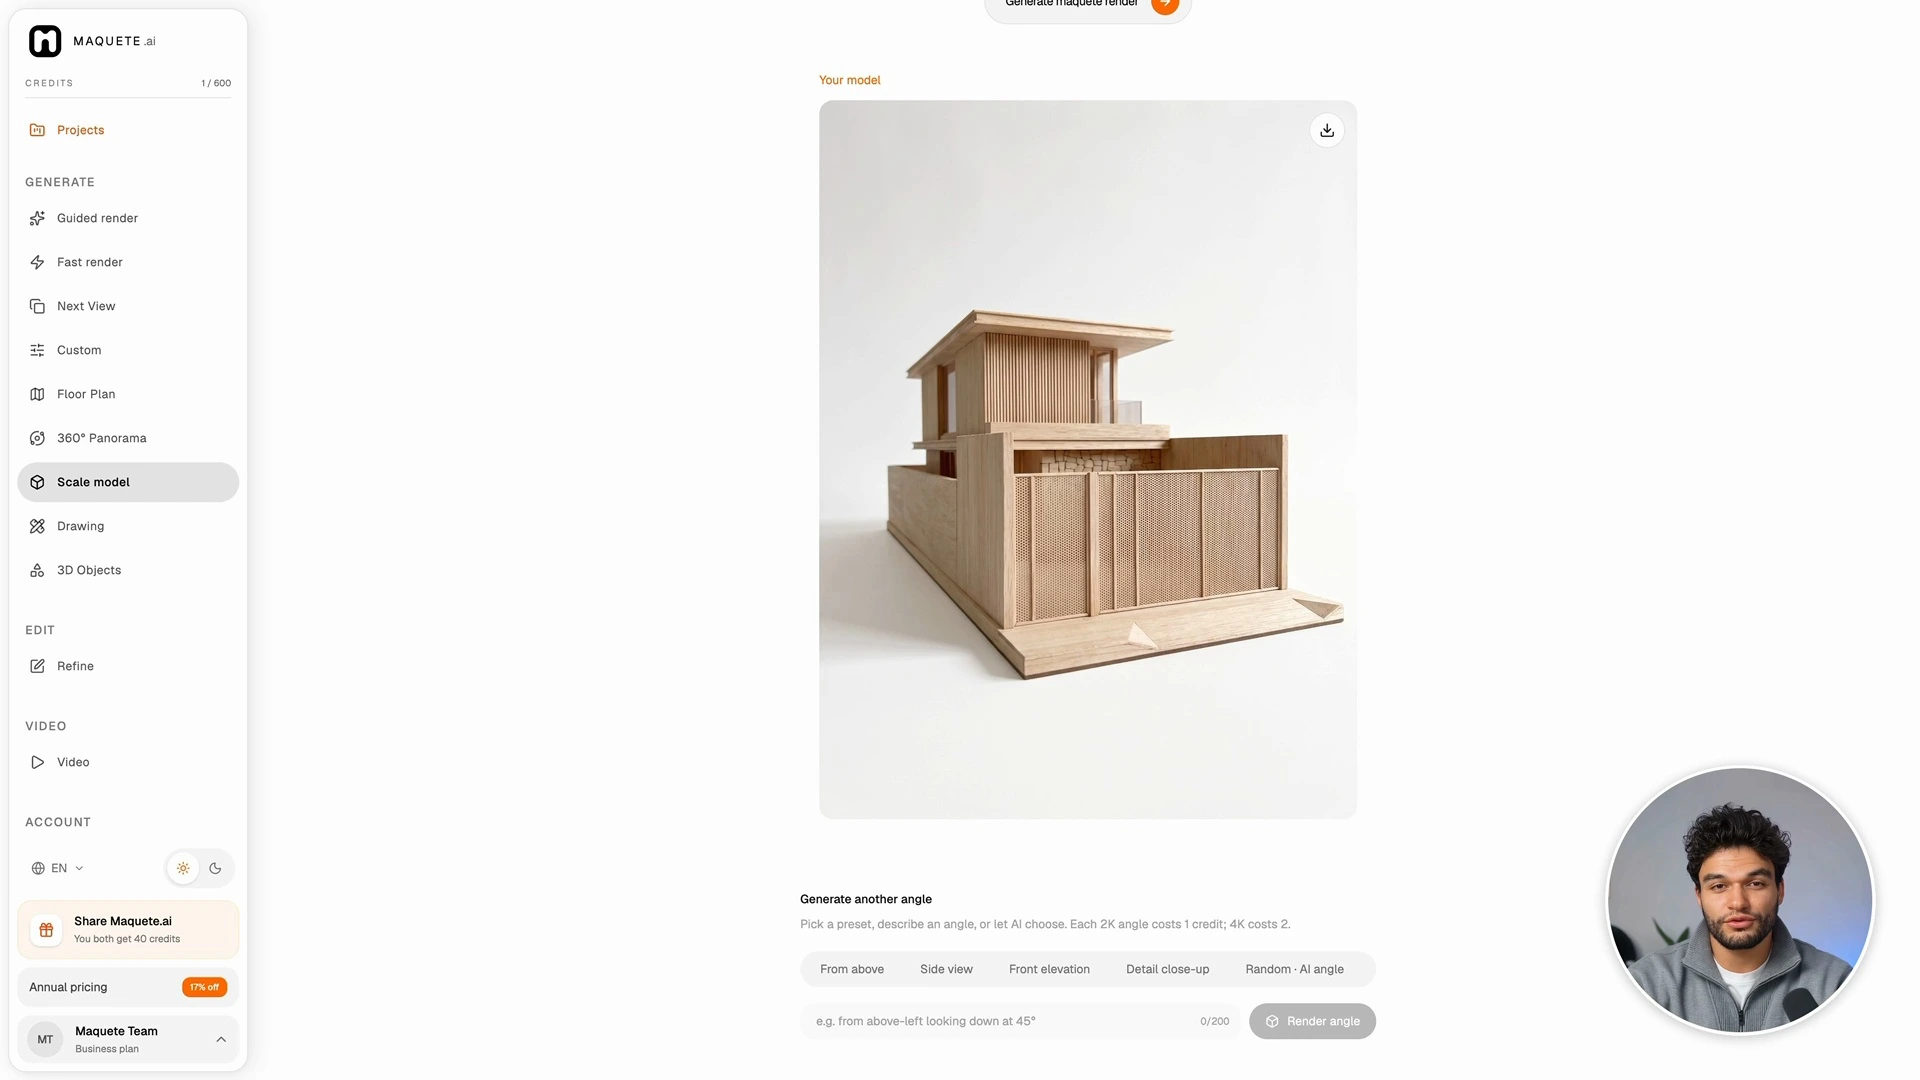
Here is the house as a balsa model on a white background. You can see the slatted upper floor, the overhanging roof and the perforated gate, all presented with the texture and scale of a miniature model. To save your model image, use the Download icon in the top-right corner of the result.
Settings that matter
Below the result, Generate another angle lets you explore other viewpoints. Choose From above, Side view, Front elevation or Detail close-up. You can also describe your own viewpoint, or choose Random to let Maquete pick one. Use Render angle to create the new image. Each additional angle uses one credit at 2K or two at 4K.
If something goes wrong
Next step
Use your model image in a project presentation.